
Today there are a huge variety of torrent clients. If you are Windows user you definitely should consider cool torrent client Bitcomet. It is based on C++. This is very simple and easy in use torrent client perfect for beginners to setup. If you download torrents with Bitcomet you need a secure VPN for Bitcomet. It will mask your IP address and encrypts all your traffic, so you can download any files safe and anonymous.
Bitcomet is a very powerful client translated into fifty languages. With Bittorent VPN you can avoid any unpleasant situations with copyright authorities. Bitcomet VPN, or a Virtual Private Network will encrypt your connection.
Besides that a VPN for Bitcomet also allows you to change your location and access any site you need.

How to Use a VPN for Bitcomet
Below you can find a guide on how to setup VPN in Windows 10. When you created a VPN for Bitcomet connection you need to turn it ON and then use Bitcomet securely.
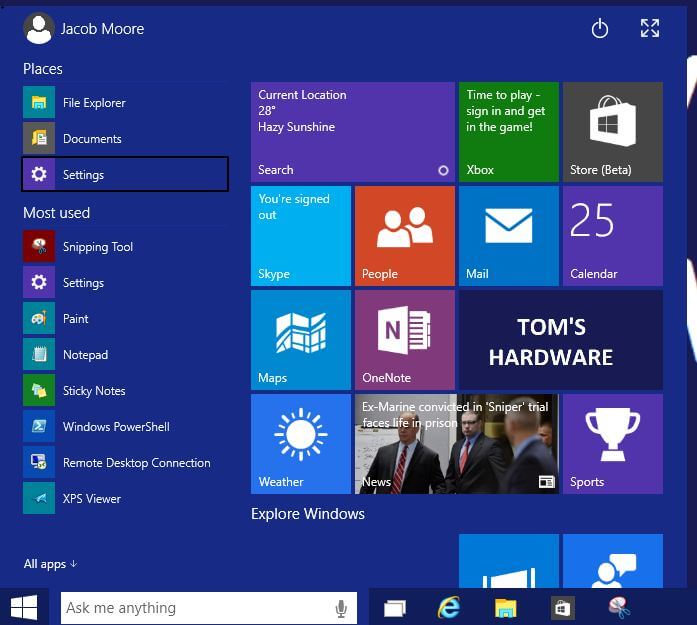
- Click the Start button — it is in bottom-left corner of the screen.
- Click Settings — it is on the left section of the displayed Start menu, under the Places section.
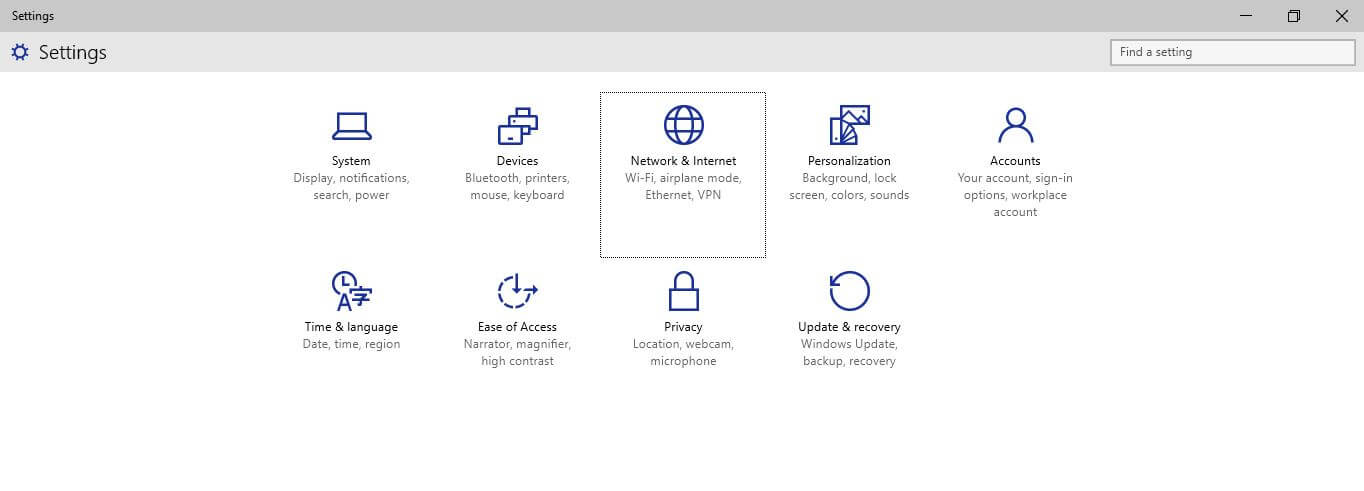
- After that click the Network & Internet icon on the Settings window.
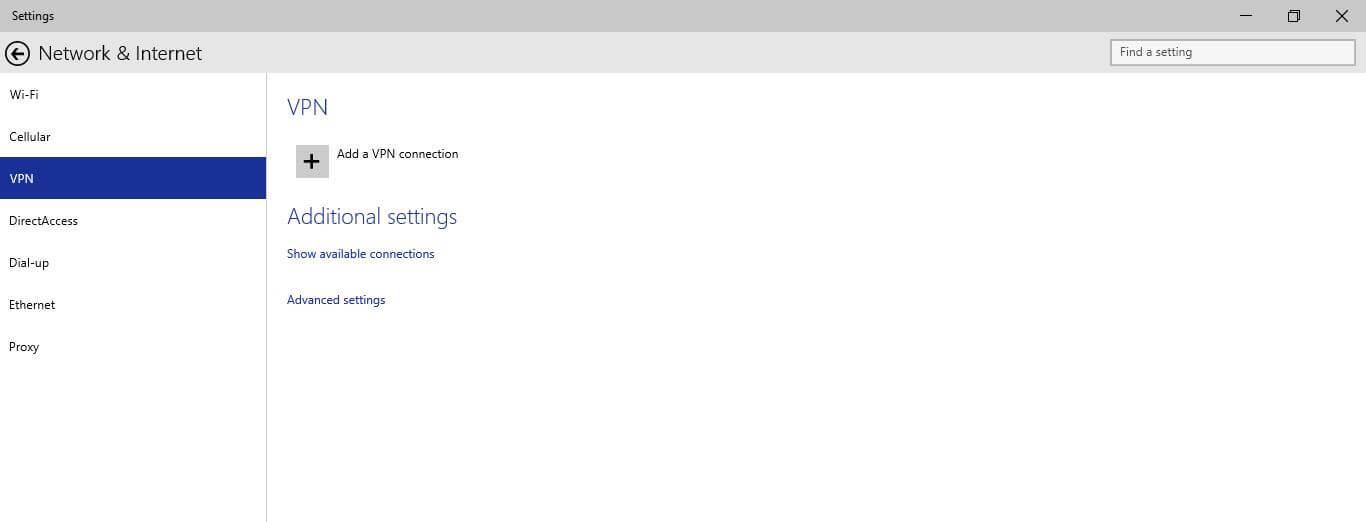
- Click to select the VPN category — on the left panel of the Network & Internet window.
- Click the + icon representing the Add a VPN con the right.
- Input correct data on the Add a VPN connection box.
- If you would like to save these data (if you are doing this from home for example) check Remember my sign-in infocheckbox at the bottom, and click Save.
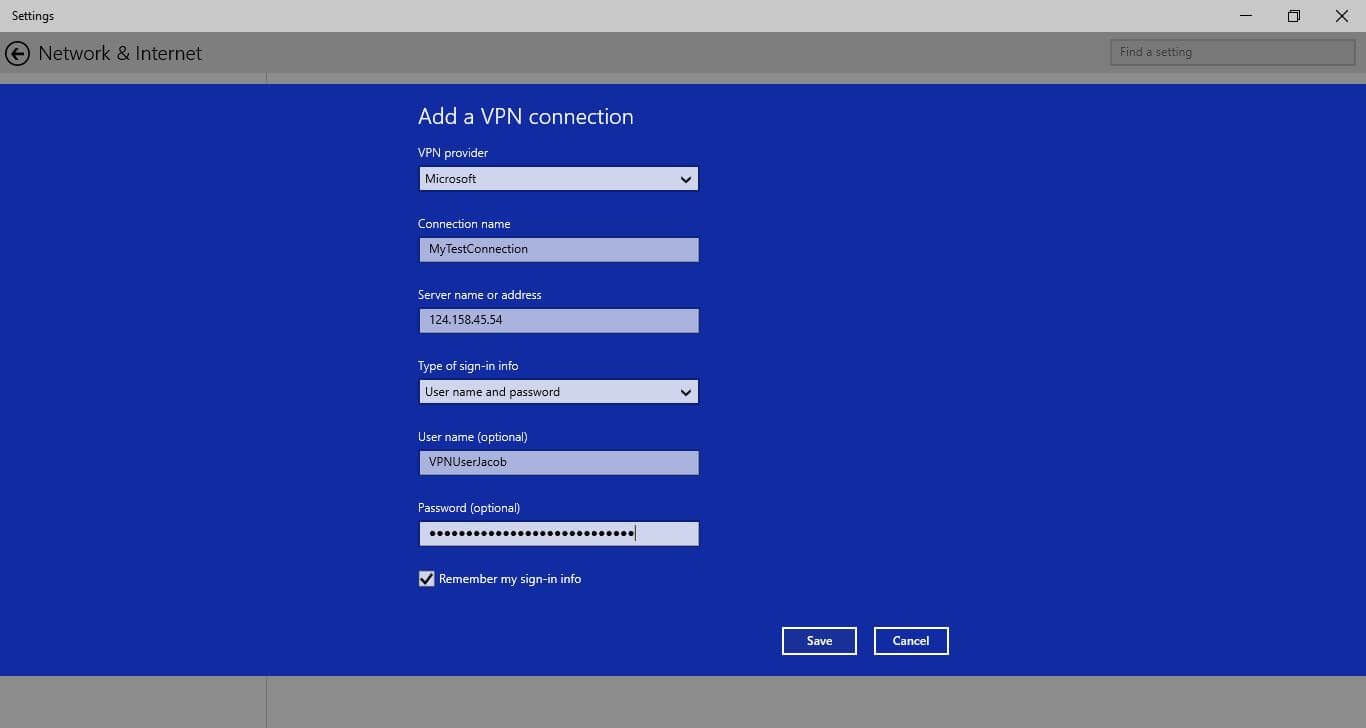
Note: You may not want to save the sign-in info on public computers such as those in Internet cafes, or libraries. Do NOT check the Remember my sign-in info when using such computers.
Now your new VPN connection is successfully created.
Go to the Network & Internet window, keeping the VPN category selected from the left pane, click to select the newly created VPN connection from the right.
Once selected, from the available buttons, you can either click Connect or Forgetto connect to the VPN server using the provided details and credentials, or to remove the created connection respectively. Optionally, if needed, you can also click the Properties button to make changes to the created VPN connection.
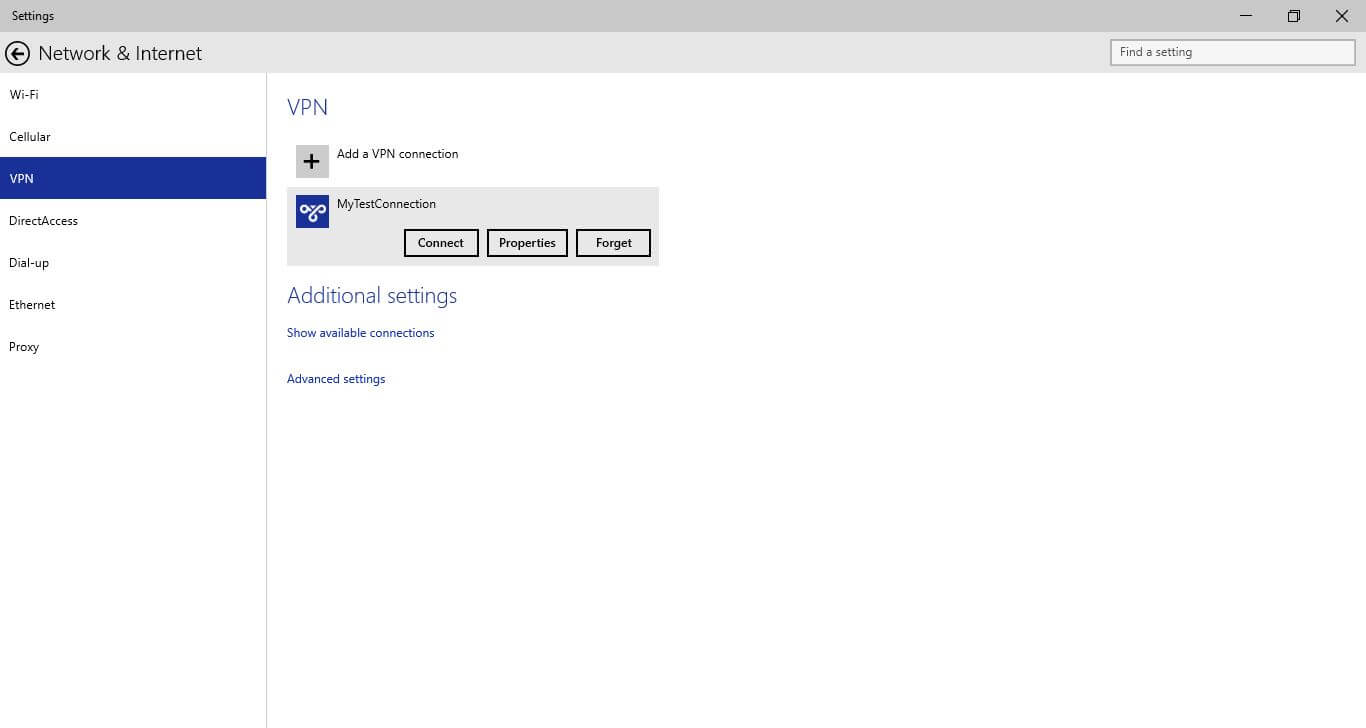
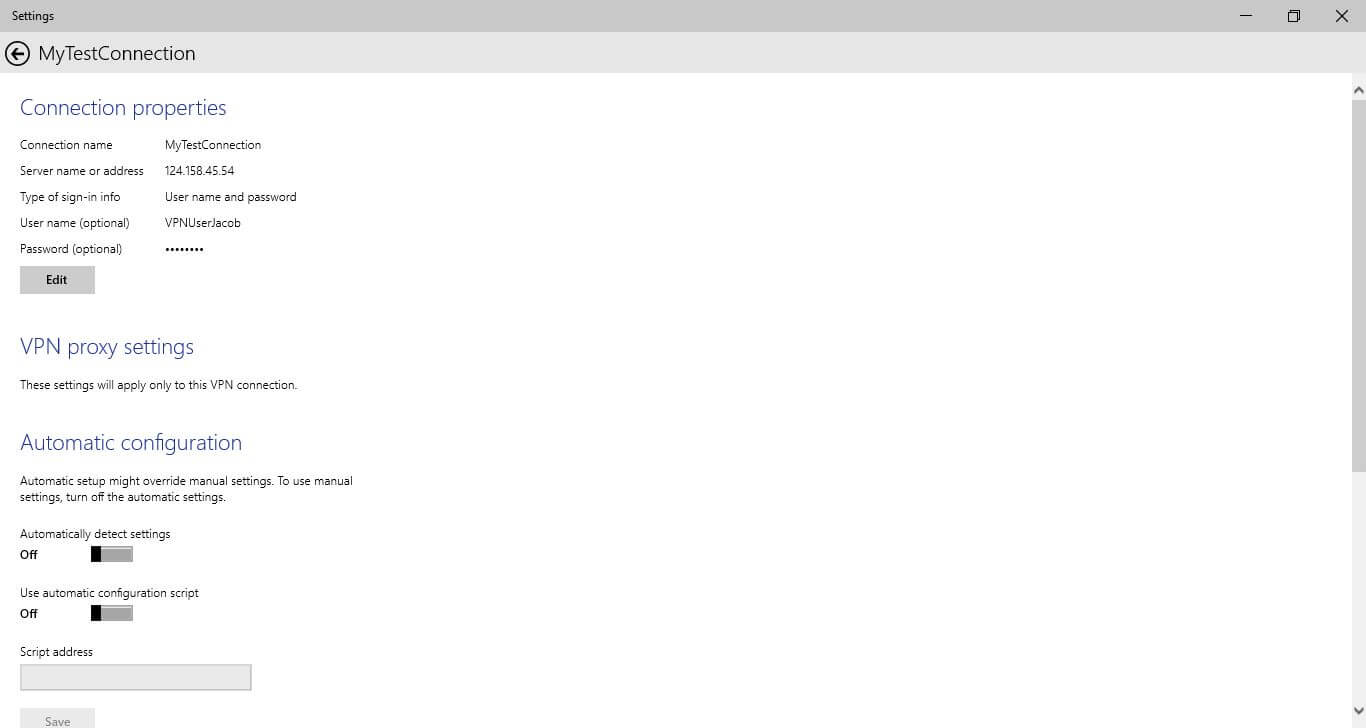
Optionally, you can click the Advanced settings option under the Additional settings section on the same window to manage other VPN connection related configurations such as proxy settings, automatic detection, etc.
After closing all the windows, you can still easily connect to the VPN server by clicking the Network icon from system tray at the bottom-right corner of the window, and clicking the Show available connections under the Additional settings section of the Wi-Fi or Ethernet category of the opened Network & Internet window.
